










FAQ
Got a question about your Pulsar device, need help choosing the right scope, or running into an issue in the field? Contact us or check out the resources listed on this page to help you out even faster.
Quick answer Pulsar Vision products are designed solely for civilian use and are not certified for military applications. Our devices are designed exclusively for civilian use . While they are built with high-quality materials and durability, they are not certified for military applications and do not meet military-grade standards .
Quick answer Pulsar Vision devices are sold exclusively through our trusted dealers. Find your local dealer here . Our products are available exclusively through trusted dealers . To purchase a Pulsar Vision device, please locate the nearest authorized dealer, where you can shop in-person or online. You can view a list of local dealers and distributors here . Many dealers also provide pricing information on their websites. Please note that product availability may vary by country. If a particular product isn’t listed, we recommend reaching out to your dealer directly—they can assist with availability details and let you know if and when the product may be in stock.
Quick answer For support, assistance, and warranty services, we recommend purchasing from a local distributor . If you decide otherwise, keep in mind that certain devices cannot be moved across countries. We strongly recommend purchasing from a local distributor to ensure you receive support and service in your language. This also helps streamline any future needs for warranty or product assistance. Please note that many digital and thermal devices, particularly riflescopes, are sold under a special license , which restricts moving them across country borders—even within the European Union. Additionally, warranty service is only available in the country where the product was purchased .
Quick answer Pulsar Vision products are only available through authorized distributors and dealers. Find our full list of official representatives here . Pulsar Vision products are available exclusively through authorized distributors and dealers . If there isn’t a local distributor in your country, we recommend checking with online dealers that may offer international shipping to your location. For a complete list of our official representatives, please click here .
Quick answer We recommend following local laws regarding device restrictions. Please contact your dealer for legal alternatives in our product range. While we appreciate your interest in our products, we cannot support or encourage any use of our devices that goes against local regulations . We always advise respecting local laws regarding product use. However, Pulsar Vision offers a wide range of products, and we’re confident you can find a legal alternative that meets your needs. You can view our complete product lineup here or reach out to your local dealer for tailored advice on suitable options.
To explore our full product range, you can view all devices and accessories on our website here . If you prefer a PDF catalog , please reach out to us at support@pulsar-vision.com . Our team will be glad to provide you with a digital catalog and any additional information you need.
Since Pulsar Vision products are sold through our network of authorized distributors and dealers , we recommend reaching out to your local dealer for information on any available discounts, special deals, or installment payment options . To find the nearest dealer, click here .
Pulsar Vision products are sold exclusively through our trusted dealers and distributors. For details on trade-in options for the specific product you’re interested in, please reach out to your local dealer directly.
All Pulsar Vision devices are sold through our network of trusted dealers and distributors. For information on refurbished or reconditioned devices, please contact your local dealer directly to see if they offer this option.
We apologize for any inconvenience caused by long waiting times. We are continuously working to align our production with demand to ensure quicker availability of Pulsar Vision products. To check when your preferred device will be in stock, please reach out to your local distributor ; they can provide you with the estimated arrival dates for specific models. If the wait time does not work for you, consider exploring other models—our range has options that may meet your needs and are often more readily available. For further assistance, feel free to contact us at support@pulsar-vision.com or get in touch with your local dealer directly.
Quick answer For the latest on new product availability, check with your local distributor or follow us on Facebook , Instagram , or through our newsletter for updates. We’re thrilled to see your excitement about new products! You can find estimated sales dates for upcoming releases on our global social media channels, Facebook and Instagram , or by subscribing to our newsletter for the latest announcements. Please remember that global release dates are estimates . Actual availability may vary by country due to shipping schedules and local regulations. For the exact availability date of your chosen product, please contact your local dealer .
Quick answer Contact your national distributor for repair cost estimates, as pricing is determined after device inspection. The repair cost for your Pulsar Vision device can only be determined after our team inspects the device to assess which parts need repair or replacement. For detailed information about repair costs, please contact your national distributor directly.
Can you provide technical drawings or electronic components? Pulsar Vision devices are advanced, high-tech products, and repairs should be handled by trained professionals . For repair assistance, please contact your seller directly, who can arrange a return for repair. Due to the complexity of our devices, we do not sell individual components or parts, and technical drawings are considered proprietary information.
Due to strict export control regulations on thermal vision devices, all returns and repairs must be processed through your local distributor or dealer .
Quick answer No registration is required to activate the warranty—just keep your purchase receipt. U.S. customers may register here for a digital record. If you purchase your Pulsar Vision product from an official distributor or dealer, a warranty card will be included, and no additional registration is required. Be sure to keep your purchase receipt as the warranty starts from the date of first purchase. For customers in the United States , you have the option to register your product here . Registration is optional, but it allows you to keep a digital record , so you won’t need to retain the physical receipt for warranty validation.
Due to strict export regulations , the warranty for Pulsar Vision products is only valid in the country where the product was purchased. We recommend buying through authorized local dealers to ensure full warranty coverage.
Yes, the warranty period is extended to account for the time your device spends in repair. Once you receive the device back, the total warranty duration will reflect this extension.
Quick answer Buy from authorized dealers to ensure authenticity, or contact support@pulsar-vision.com with your serial number for verification. The best way to ensure you’re purchasing a genuine Pulsar Vision product is by buying from our official distributors and authorized dealers. You can find the full list of authorized dealers here . If you have any concerns, please send the serial number of your device to support@pulsar-vision.com . Our team will verify the authenticity of your product. The serial number is a 7- to 9-digit number located on your device’s housing. Alternatively, you can find it in the main menu under “Device information.”
Quick answer Contact your seller to arrange repair, as all repairs must go through your original point of purchase. Due to export restrictions , all Pulsar Vision repairs must be handled through your original seller . Please contact your seller directly to arrange for shipping, drop-off, or return of your device for repair.
For return authorization , please contact your seller or national distributor —they will help you arrange the return. For customers in the United States , you can fill out the return authorization form here .
We aim to complete repairs as quickly as possible, with a maximum turnaround time of 30 days (plus shipping time). However, the exact repair duration depends on the complexity of the issue and the workload at your local service center. Your seller can provide a more specific repair timeline.
We provide repair service for the products on the market for five years from the date of sale or, if this date cannot be defined, from the date of production.
Yes, as long as you have proof of purchase , your warranty remains valid. Please contact your national distributor or seller for assistance and additional warranty support.
No, technical drawings and electronic components (sensor, display, circuit board etc.) cannot be shipped. Please contact your national distributor to arrange product return.
Absolutely! While wear and tear on the exterior of your device isn’t covered by warranty, we offer paid repairs for restoring its appearance. To arrange a return for appearance repair , please reach out to your seller directly.
Due to strict export policies , the transferability of the warranty may vary depending on national regulations . For specific details, please contact your local distributor or seller to understand the warranty transfer options in your country.
To prevent damage during transit, please pack your device securely in a sturdy shipping carton . For a smooth repair process, include the following items: A detailed description of the issue and the conditions under which it occurs. A copy of the purchase receipt (invoice/bill) showing the purchase date and location. Your contact information , including return address, phone number, and contact person’s name. The warranty card filled in by the seller.
Our warranty covers Pulsar Vision products for three years from the date of purchase, guaranteeing they are free from defects in materials and workmanship . For rechargeable batteries , the warranty period is one year , which applies to both the batteries included with your device and any purchased separately. If you don’t have a purchase receipt and your warranty card isn’t filled out, the warranty period will start from the manufacturing date plus six months . For more information, please see our warranty page here .
To purchase spare parts for your device, please reach out to your national distributor or local seller directly. Note that spare parts for discontinued products may not always be available.
Since all repairs are handled through your seller , they will notify you as soon as your device is repaired. If you would like a repair status update or an estimated completion date , please contact your seller for the latest information.
The image freezes during calibration – this is normal. Use Automatic mode by default. Close lens cover before manual calibration. I can see a ghost image / residual artefact of the previous image (binoculars). You are using manual calibration mode without closing the lens cover. Close the lens cover during calibration or switch to automatic mode.
Quick answer The clicking sound during calibration is normal in automatic modes. To avoid it, switch to manual calibration and close the lens cover during the process. The clicking sound is normal in automatic and semiautomatic calibration modes and cannot be turned off. Solution to Avoid the Sound: Switch to manual calibration mode to eliminate the clicking noise. Important: When using manual calibration, ensure the lens cover is closed during calibration to prevent ghost images or residual artifacts on the display. For further details, refer to your device’s user manual .
Quick answer User Mode saves your preferred brightness and contrast settings for each observation mode, ensuring optimal image quality without readjustments. The User Mode function allows you to save your preferred brightness and contrast settings for optimal image quality. This eliminates the need for additional adjustments during future uses. Key features of User Mode: Saves settings: Stores brightness and contrast settings specific to each observation mode. Automatic recall: Reactivating User Mode restores the previously saved settings, even if temporarily disabled. Persistent memory: Settings remain stored in the device’s memory even when the device is turned off or User Mode is disabled. How to enable: Activate User Mode in the main menu of your Pulsar thermal imaging device. It remains active until manually disabled.
My image is blurry or is out of focus. Please make sure you have made the following adjustments: First, adjust the diopter adjustment on the eyepiece to clearly see the icons on the display and in the status bar. Second, adjust the lens focus to see the object of observation clearly. Please note that re-focusing may be required as the distance to the object changes. Do the image calibration – either in manual mode (with lens cover closed) or in automatic mode. Select the most suitable observation mode – “Forest”, “Rocks” or “Identification” depending on the specific observation conditions. Go through the different color palletes. Manually adjust display contrast and brightness. We recommend keeping those two values at similar levels. A huge difference between them badly affects the image quality. Try turning Image Detail Boost ON and OFF. The greatest benefit of this feature can be enjoyed in scenery with high contrast and at shorter distances.
To switch between color modes: Open the menu of your Pulsar device. Navigate to the menu item labeled “Color Modes” and select it. Choose your preferred color mode. For detailed instructions and additional information, please refer to the user manual .
Yes. Connect your binoculars to a computer and select “Use as memory card” option when it appears on screen.
User Mode saves selected brightness and contrast settings providing optimal image quality for the next use. It stores settings per observation mode even when temporarily disabled.
The Merger LRF XQ35 is the lightest and most compact device (181x133x68mm) in the Merger line, weighing only 830g. Its operating time is 11 hours vs 9 hours for XP50 and 8 hours for XL50.
Quick answer Remove and re-insert the battery, restart the binoculars, and try pressing the menu button again. If the menu button is unresponsive, try these steps: Remove and re-insert the external battery: Take out the battery, wait a few seconds, and re-insert it securely. Restart the binoculars: Turn the device off and back on. Press the menu button again: Check if the menu button responds after restarting.
Quick answer Up to 0.5% of non-functional pixels is allowed by the sensor and is not considered a defect. However, you can try repairing them using the pixel repair feature Flickering pixels or pixel clusters are normal to a certain extent. Up to 0.5% of non-functional pixels is allowed by the sensor and is not considered a defect. However, you can try repairing them using the pixel repair feature: Steps to repair flickering pixels: Activate the Pixel Repair Option: Open the pixel repair menu in your device. Refer to your device’s user manual for specific instructions. Locate and repair pixels: The screen will display a picture-in-picture (PiP) mode with an auxiliary cross. Use the navigation buttons to move the cross to the location of the defective pixel. The flickering pixel will disappear when the cross is properly aligned. Confirm the repair: Press the ON/OFF button and wait for an “OK” message to confirm the repair. Watch a video tutorial: For additional guidance, watch this Pixel Repair Video .
Quick answer The display turns off due to the proximity sensor. Disable it in the settings to control the display manually with the ON/OFF button. The display turns off due to the proximity sensor detecting that the device is no longer near your face. How to manage the proximity sensor: Turn off the proximity sensor: Go to the device settings and disable the proximity sensor. For detailed instructions, visit the Merger LRF Manual . Manual display control: When the proximity sensor is disabled, you can manually turn the display on/off by pressing the ON/OFF button.
Quick answer The Merger LRF has a 3-year warranty, 1-year coverage for rechargeable batteries, and 3 years for the internal battery. If no receipt is available, the warranty starts 6 months after the manufacturing date. The warranty conditions for the Merger LRF are as follows: Device warranty: The Merger LRF is covered for three years from the date of purchase. Rechargeable battery warranty: Warranty for rechargeable batteries (supplied with the device or purchased separately) is one year . The internal battery in the Merger LRF has a three-year warranty . Without a purchase receipt or warranty card: If no purchase receipt or warranty card is available, the warranty period begins six months after the manufacturing date . For more details, visit the Warranty and Service Page .
Calibration levels the background temperature of the microbolometer and eliminates image flaws. The longer the device operates nonstop, the less frequently calibration is required. There are defective pixels on the screen of my thermal imaging device (binoculars). You may try repairing the pixels using the respective menu item. Refer to the user manual for details. My Merger LRF is not measuring distance correctly. Accuracy depends on reflection ratio of the target surface, angle of the emitting beam, and environmental conditions. Measuring a small sized target is more difficult. Accuracy can also be affected by weather conditions.
Quick answer Distance measurement accuracy depends on target reflectivity, environmental conditions, and target size. Stabilize the device when measuring small targets over 400 meters. The accuracy of distance measurement depends on several factors. Consider the following points: Target surface reflection: Measurement accuracy and maximum range depend on the reflectivity of the target surface. Reflectivity is influenced by surface texture, color, size, and shape. Bright or shiny surfaces reflect better than dark or matte surfaces. Environmental conditions: Light conditions, fog, haze, rain, or snow can affect measurement accuracy. Ranging performance may degrade in bright sunlight or when pointing the device toward the sun. Target size and distance: Measuring the range to a small-sized target is more challenging than to a large one, especially at distances greater than 400 meters . Stabilization for long-distance measurement: For small targets at long distances, stabilize the device by resting your elbow on a solid surface to counter hand tremors and ensure the beam accurately hits the target.
Proceed to the menu and select the menu item “Color modes”. Refer to the user manual for details.
Yes, you can connect your Merger binoculars to a computer using the supplied USB cable. Steps to transfer files: Connect the binoculars to your laptop using the USB cable. When prompted on the binoculars’ screen, select “Use as memory card.” Access the video files from your laptop’s file explorer. For more details, refer to the Merger LRF Manual .
You don’t need to register your device to activate the warranty. When you purchase a Pulsar device from an official distributor or authorized dealer, you receive a warranty card along with it. The warranty period begins from the date of the first purchase of the device. Please also retain your payment receipt as proof of purchase. For service-related inquiries: Please contact the authorized distributor in your country . If you are located in the United States , reach out to our U.S. distributor, Sellmark .
Follow these steps to update your Merger firmware: Step-by-step instructions: Download the Stream Vision app: Get the app for free from Google Play or the App Store . Connect your Merger to your smartphone or tablet: Ensure a stable connection between your Merger and mobile device. Launch the Stream Vision app: Go to the “My Devices” section. Select your Merger device and press “Check Updates.” Download and unstall the epdate: If your Merger is connected to your phone, enable Mobile Data Transfer (GPRS/3G/4G/5G) to download the update. If your Merger is listed in “My Devices” but not connected, you can use WiFi to download the update. Complete the update process: Wait for the update to download and install. The device will automatically reboot once the installation is complete. Additional help: For detailed guidance, watch the video instructions .
Yes, the Merger LRF is equipped with a 1/4″ tripod mount , making it compatible with most standard tripods. How to install on a tripod: Follow the detailed instructions for installing the Merger on a tripod by referring to the Merger LRF Installation Guide .
es, the Merger LRF XP50 is equipped with a 1/4″ tripod mount for stable usage with a tripod. Instructions for Installation: Follow the detailed steps for installing the Merger on a tripod by visiting the Merger LRF XP35 Manual .
The external battery falls out of the Merger LRF binoculars. Please make sure the battery is installed correctly as recommended: Before installing the battery, make sure that there is an undamaged rubber insulating ring on the battery. The ring is designed to protect your device from moisture getting inside. Damage to the device due to a missing ring is not covered by the warranty. Install the battery into the battery compartment that a pictogram in the form of a “dot” on the battery on the left. You will hear a click when the battery is placed correctly.
The Merger LRF is powered with two rechargeable batteries: one built-in with a capacity of 4 Ah, the other replaceable with a capacity of 3.2 Ah. A single charge guarantees up to 8 hours of battery life. The external battery falls out of the Merger LRF XP50. Before installing the battery, make sure there is an undamaged rubber insulating ring on the battery. Install the battery so a dot pictogram is on the left. You will hear a click when correctly placed.
The Merger LRF is powered by two rechargeable batteries: Built-in battery with a capacity of 4 Ah . Replaceable battery with a capacity of 3.2 Ah .
The housing of the Merger LRF is constructed from high-quality reinforced magnesium alloy , ensuring durability and a lightweight design.
Quick answer Hold the ON button for 15 seconds to reset. If it doesn’t turn on, charge the battery or connect a power bank. If your Merger LRF binoculars won’t turn on, try the following steps: Perform a reset: Press and hold the ON button for 15 seconds . This should restart the device. Check the battery: If the device still doesn’t turn on, the internal battery may be empty. Charge the internal battery or connect an external power source, such as a fully charged power bank. Contact support if needed: If the issue persists, reach out to our support team at support@pulsar-vision.com .
There are no thermal imagers able to look through glass because glass does not let infrared radiation within 8-14 um pass.
All Merger LRF binoculars are now compatible with the Stream Vision Ballistics app and, therefore, now come with ballistics data. If your device does not support Stream Vision Ballistics, make sure you have the latest firmware update .
The Merger LRF XP35 stands out as the most compact and lightweight model in the Merger line. It features an exceptionally wide field of view (17.8 °) , allowing you to scan vast areas with ease, maintain terrain awareness, and reduce eye fatigue, even during prolonged use. It is equipped with our European-made Lynred sensor boasting sNETD <18 mK , which ensures highly detailed imaging even in challenging weather conditions like rain, fog, or cold.
Quick answer Distance measurement accuracy depends on target reflectivity, environmental conditions, and target size. Stabilize the device when measuring small targets over 400 meters. The accuracy of distance measurement depends on several factors. Consider the following points: Target surface reflection: Measurement accuracy and maximum range depend on the reflectivity of the target surface. Reflectivity is influenced by surface texture, color, size, and shape. Bright or shiny surfaces reflect better than dark or matte surfaces. Environmental conditions: Light conditions, fog, haze, rain, or snow can affect measurement accuracy. Ranging performance may degrade in bright sunlight or when pointing the device toward the sun. Target size and distance: Measuring the range to a small-sized target is more challenging than to a large one, especially at distances greater than 400 meters . Stabilization for long-distance measurement: For small targets at long distances, stabilize the device by resting your elbow on a solid surface to counter hand tremors and ensure the beam accurately hits the target.
Accolade 2 LRF Pro features a ground-breaking temperature sensitivity (NETD lower than 25 mK) enabling detection of the smallest temperature differences.
No, the Accolade 2 LRF is not designed to be used as goggles or with a head mount.
Stream Vision & Stream Vision 2 Compatibility Compatible with Stream Vision 2 Mobile App Compatible only with Stream Vision Digital night vision monoculars Forward FN 455S Forward F455 Thermal Imaging Binoculars Accolade / Accolade LRF Accolade 2 LRF Accolade 2 LRF XP50 Pro Digital night vision riflescopes Digisight Ultra N450 / N455 Digisight Ultra N450 LRF / N455 LRF Digex N450 / N455 Digex С50 Thermal imaging monoculars Axion XM Axion XQ Helion XP / XQ Helion 2 XP Lexion Proton XQ30 Digital night vision riflescopes Digisight Ultra N450 / N455 Digisight Ultra N450 LRF / N455 LRF Digex N450 / N455 Digex С50 Thermal imaging front-mounted attachments Proton FXQ30 Thermal imaging monoculars Telos Telos LRF Krypton 2 XG / XQ Krypton XG50 Helion 2 XP50 Pro Helion 2 XQ Axion 2 XG / XQ / XQ Pro Axion 2 LRF XG / XQ / XQ Pro Axion XM30F Thermal imaging riflescopes Trail LRF Thermal imaging binoculars Merger LRF Thermal imaging front-mounted attachments Krypton 2 FXG / FXQ Krypton FXG50 Thermal imaging riflescopes Thermion XQ / XM / XG / XP Thermion 2 XP /
A multispectral binocular combines a thermal imaging channel and a digital day/night channel, enabling heat-based target detection while simultaneously providing a detailed visual image.
This mode swaps the functions of the buttons from left to right for the convenience of left-handed users. The button icons do not change.
Three years from date of purchase. One year for rechargeable batteries. Three years for the internal battery. Without receipt, warranty starts from manufacturing date plus six months. The Merger DUO NXP doesn’t turn on. Press and hold down the ON button for 15 seconds. If this does not help, the battery may be empty – charge or connect a power bank.
Is it a defect? Quick answer Blurry images with digital zoom are normal due to reduced resolution from image cropping. It’s not a defect. This is not a defect. When you use digital zoom, the image is cropped, which reduces the resolution. As a result, the image may appear less clear compared to the base optical magnification. This is a normal characteristic of digital zoom across all devices.
You are using the manual calibration mode without closing the lens cover. Please make sure the lens cover is closed during calibration or switch to the automatic calibration mode if you do not want to close the cover.
Quick answer The User Mode function saves brightness and contrast settings in the device’s memory, ensuring optimal image quality for future use without additional adjustments. The User Mode function saves selected brightness and contrast settings in the device’s memory providing optimal image quality for the next use of the thermal imager immediately, with no additional adjustments needed. The function is enabled in the main menu of Pulsar thermal imaging devices and remains active until the user disables it. While the function is active, the thermal imaging device will save the latest brightness and contrast settings specific to each observation mode. They are stored in the memory even if you temporarily disable the User Mode. Reactivating it will return the saved brightness and contrast settings.
If the menu button isn’t responding, try the following steps: Remove and reinsert the external battery. Turn the device off and back on. Press the menu button again to check if it responds.
The Merger Duo NXP is equipped with a 1/4″ tripod mount. Please follow the instructions for installing Merger on a tripod here .
The Merger Duo is powered by two rechargeable batteries: Built-in battery : 4 Ah capacity Replaceable battery : 3.2 Ah capacity A single charge provides up to 7 hours of battery life , ensuring long-lasting performance in the field.
Quick answer Calibration adjusts the microbolometer’s background temperature and removes visual flaws. Image calibration is essential to level the background temperature of the microbolometer and eliminate visual flaws, such as vertical stripes or ghost images of previously viewed objects. The frequency of calibration depends on how long the thermal imager has been operating continuously. The longer the device runs nonstop, the less frequently calibration is required.
Powered with two rechargeable batteries: one built-in with 4 Ah capacity, the other replaceable with 3.2 Ah. Up to 7.5 hours battery life on a single charge.
Quick answer Dead pixel repair is only supported in the thermal channel, not the digital channel. Unfortunately, no. Dead pixel repair is only available for the thermal channel and isn’t supported for the digital channel.
The digital channel is designed exclusively for daytime use. For low light conditions or complete darkness, switch to the thermal channel for optimal performance.
Quick answer To activate PiP Mode on your Merger Duo, go to the main menu, select ‘PiP mode,’ and toggle it on. Learn more here . To activate the Picture-in-Picture (PiP) mode on your Merger Duo, follow these steps: Access the main menu : Press and hold the Menu button to enter the main menu. Navigate to ‘PiP mode’ : Use the navigation buttons to scroll to the ‘PiP mode’ option. Enable PiP mode : Press the Menu button again to toggle the PiP mode on. Once activated, the PiP mode will display a small window showing a magnified image at the top of the screen, enhancing your viewing experience. For more detailed instructions, please refer to the Merger Duo user manual .
Quick answer Go to the menu, select “Color Modes,” and choose your preferred option. You can switch between color modes in both thermal imaging and multispectral PiP modes. To do this: Access the menu . Select the “Color modes” menu item. Choose your preferred color mode. For detailed instructions, refer to the user manual.
Quick answer Warranty registration is not required. Keep your payment receipt and warranty card. US customers can register here or contact Sellmark for assistance. Device registration is not required to activate your warranty. When purchasing from an authorized Pulsar distributor or dealer, you will receive a warranty card with your device. The warranty starts from the date of purchase. Be sure to keep your payment receipt as proof of purchase. For service-related questions, contact the distributor in your country via the Pulsar distributor directory . If you are in the United States, you can register your product using this link or reach out to our US distributor, Sellmark via email: customerservice@sellmark.
No, the Merger DUO NXP does not have an integrated laser rangefinder, but you may use the stadiametric rangefinder.
Quick answer The Merger Duo NXP50 combines thermal and digital night vision with multiple viewing modes. The Merger LRF is purely a thermal imaging device. The Merger Duo NXP50 are innovative multispectral binoculars that combine thermal imaging and digital night vision in a single device, offering: Thermal sensor : 640×480 resolution @ 17 µm Digital night vision sensor : Full-HD 1920×1200 resolution for extra low-light conditions Viewing modes : Thermal, digital, and combined Battery life : Up to 7 hours IR illuminator wavelength : 940 nm In contrast, the Merger LRF line is a purely thermal imaging device, designed for thermal imaging functionality only. To learn more about the Merger Duo NXP50, click here .
The housing of the Merger Duo NXP is crafted from high-quality, reinforced magnesium alloy , ensuring durability and a lightweight design.
Quick answer Hold the ON button for 15 seconds. If it doesn’t work, charge the battery or connect an external power source. For help, email support@pulsar-vision.com . If your Merger Duo NXP doesn’t turn on, follow these steps: Press and hold the ON button for 15 seconds to force the device to turn on. If it still doesn’t power up, check if the battery is empty . Charge the internal battery or connect a charged external power source, such as a power bank. If the issue persists, contact us at support@pulsar-vision.com for further assistance.
Yes, the binocular can be powered by an external power bank via USB.
Yes. The device supports the Duo multispectral mode, in which one channel is in the main window and the other in a Picture-in-Picture window.
Yes, multispectral binoculars are designed to operate at low temperatures down to -25 degrees C.
Yes, the binoculars support photo and video recording, including audio recording.
Operating time is 6-8 hours on average depending on the model. Sleep mode can save up to 30% of battery power.
Yes, the devices feature IP67 protection, ensuring resistance to dust, rain, and short-term water immersion.
Yes, the device has a built-in laser rangefinder measuring distances up to 1,500 meters.
The digital channel supports daytime, twilight and nighttime operation using a focusable infrared IR illuminator in night mode.
Multispectral binoculars allow users to detect targets more quickly using thermal channel, identify objects more accurately using digital channel, and utilize Picture-in-Picture modes combining both channels.
The device is equipped with a digital sensor with a resolution of 3840×2160 pixels.
Depending on the model: DXR50 uses 640×480 @ 12 um; DXT50 uses 1280×1024 @ 12 um.
The digital channel can be used in color day, color twilight and black-and-white night modes.
The batteries included with your Pulsar device, or those purchased separately, are partially charged . However, for the best experience, we recommend fully charging the batteries before first use. For detailed battery information, refer to the user manual of your device.
Our devices are designed for thermal imaging but don’t include a temperature measurement function. If you need precise temperature readings, you might want to look into specialized thermal cameras.
Quick answer Pulsar riflescopes support calibers up to 6000 Joules. Verify this value for your cartridges before using. Yes, all Pulsar riflescopes are built to handle a maximum shock resistance of 6000 Joules , making them compatible with heavy-caliber rifles . However, always check the shock resistance value of your specific cartridges before use.
Unfortunately, this is not possible. Thermal imaging relies on capturing heat within a specific wavelength range, and glass does not allow infrared radiation (8–14 É¥m) to pass through.
Quick answer Avoid exposing your device to direct sunlight or laser radiation, and don’t use it in temperatures above +50 °С to avoid any damage. Yes, but only under specific conditions. We strongly recommend avoiding exposure to powerful energy sources such as the sun or laser radiation when the lens cap is open, as these can negatively impact the device’s accuracy. Additionally, while Pulsar thermal imagers are designed to operate in temperatures up to +50 °С , using them in higher temperatures may cause damage.
Is it dangerous? Quick answer Thermal imagers are safe and do not emit radiation; they only receive infrared signals. No, Pulsar thermal imagers are completely safe to use. They do not emit any radiation—instead, they are receivers . The device collects natural infrared emissions from objects, processes the data, and displays the thermal image on the screen, similar to how a digital camera works.
The service life of a Pulsar device varies depending on its use and care. While all devices come with a three-year warranty covering free repairs for manufacturing defects, they are known to last well beyond this period. To maximize your device’s lifespan, follow the operation guidelines , adhere to maintenance and cleaning recommendations , available in the user manual , and use only authorized service centers for repairs if needed.
Quick answer Zoom zeroing allows for more precise riflescope adjustments by reducing the click value at higher magnifications. Zoom zeroing enhances the precision of riflescope zeroing by allowing adjustments while the scope is zoomed in. For instance, at 2x magnification , the click value becomes twice as small (e.g., 1.6×2=3.2). Similarly, at 4x magnification , the click value reduces to one-fourth. This allows for finer adjustments to the point of impact, resulting in a more accurately zeroed riflescope . Click values for each scope are detailed in the reticle catalog or user manual .
Is it a defect? No, this is not a defect. The image freezing is part of the calibration process, which ensures optimal image quality. By default, the calibration mode is set to Automatic , meaning the device decides when calibration is necessary. You can switch to Manual mode in the Main Menu > Calibration Mode if you prefer to calibrate the riflescope yourself based on image quality. When using Manual mode, always close the lens cover before calibrating. However, we recommend keeping the calibration mode set to Automatic for convenience and consistent performance. For more details, refer to the user manual for your thermal device.
There is a radiator in the device body designed to remove heat from electronic components, providing them with the required operating temperature. After a shot, a semi-circular flare appears at the bottom of the thermal imaging image. Possible cause: The gun is equipped with a compensator or silencer that radiates heat when fired. Solution: It is recommended to raise the height of the riflescope to a level at which the flare is not visible, then re-zero the riflescope.
Quick answer Ensure the device is fully turned off and updated. Batteries naturally lose charge if unused for extended periods. If your unit appears to drain the battery when off, check the following: Ensure the device is fully switched off by holding the ON/OFF button for more than 3 seconds until a countdown appears. Pressing the button for less than 3 seconds activates “ Display Off ” mode, which still consumes power. Confirm your device has the latest firmware installed for optimal energy efficiency. If storing the device for a long period, note that batteries naturally lose charge over time. Follow the user manual to maintain battery health.
At positive temperatures , objects and backgrounds warm up at different rates, resulting in better temperature contrast for thermal imaging. However, at low temperatures , objects and the environment tend to cool to similar temperatures, reducing contrast and leading to less detailed images.
To resolve this issue, follow these steps: Ensure that your device is running the latest firmware . If not, update it by checking for updates here . If the firmware is up-to-date but the issue persists, download the video to your iPhone and use an alternative media player like VLC to play the file.
Quick answer Thermal devices are export-sensitive outside the EU, and some countries may require an import license. Check with the destination country’s customs service for specific regulations. Traveling with a thermal imager may require specific permissions depending on your destination: Export sensitivity: Thermal devices are considered export-sensitive when taken outside the EU. Import restrictions: Some countries may require an import license to bring thermal devices into their territory. Customs regulations: Contact the customs service of your destination country to check if there are any restrictions or special requirements for importing thermal devices as personal belongings.
Restoring a previous firmware version is not supported on Pulsar devices. Once updated, the firmware cannot be downgraded to an earlier version.
This issue occurs if you use manual calibration without closing the lens cover. To avoid ghost images, always close the lens cover during manual calibration . If you prefer not to close the cover, switch to the automatic calibration mode.
My image is blurry or out of focus. Please make sure you have made the following adjustments: First, adjust the diopter adjustment on the eyepiece to clearly see the icons on the display and in the status bar. Second, adjust the lens focus to see the object of observation clearly. Please note that re-focusing may be required as the distance to the object changes. Do the image calibration – either in manual mode (with lens cover closed) or in automatic mode. Select the most suitable observation mode – “Forest”, “Rocks” or “Identification” depending on the specific observation conditions. Go through the different color palletes. Manually adjust display contrast and brightness. We recommend keeping those two values at similar levels. A huge difference between them badly affects the image quality. Try turning Image Detail Boost ON and OFF. The greatest benefit of this feature can be enjoyed in scenery with high contrast and at shorter distances.
To change the color modes on your device: Open the menu on your device. Navigate to the “Color Palettes” menu item. Select your desired color mode from the available options.
Quick answer Use the pixel repair feature in your thermal imager’s menu. Refer to the user manual or watch this video tutorial for guidance. To address defective pixels or pixel clusters on your thermal imaging device: Use the pixel repair function: Most thermal imagers include a pixel repair menu option to fix defective pixels. Refer to your device’s user manual for detailed instructions. Watch a video tutorial: View sample video instructions here: Pixel Repair Instructions .
Quick answer A small number of defective pixels is normal. Use the Pixel Repair function in the menu to remove them by aligning the auxiliary cross. A small number of non-functional pixels (up to 0.5% of the total quantity ) is allowed by the sensor and is not considered a defect . However, you can attempt to repair them using the built-in Pixel Repair function . How to repair defective pixels: Access the Pixel repair menu: Open the device menu and select Pixel repair . Use Picture-in-Picture (PiP) mode: The screen will display an auxiliary cross in PiP mode. Locate the defective pixel: Use the navigation buttons to move the cross to the location of the bad pixel. The defective pixel should disappear once the cross is correctly aligned. Confirm the repair: Press the ON/OFF button and wait for the “OK” message on the display. Watch a video guide: For a step-by-step tutorial, watch the Pixel Repair Instructions .
Pulsar does not sell electronic components for self-upgrades. To upgrade your device, you need to send it to our service center for professional assistance.
The base optical magnification is fixed and cannot be adjusted.
Quick answer Yes, the device battery can be charged using a power bank. Yes, the device battery can be charged using a power bank. Power bank output of 2A: You can use the device while charging the APS battery simultaneously. Power bank output of 1A: The battery will only charge if the device is switched off .
Will it damage the device? The Image Detail Boost function is safe for extended use and does not harm your device. It is specifically designed to enhance image quality without causing any damage or reducing the device’s lifespan.
Image Boost is not available as a dedicated feature but it’s incorporated in all observation modes. The riflescope is not measuring distance correctly. Accuracy depends on the reflection ratio of the target surface, the angle of the emitting beam, and environmental conditions. Measuring range to a small sized target is more difficult. Accuracy can also be affected by light conditions, fog, haze, rain, or snow.
To change the magnification on your device, turn the digital zoom adjustment ring located on the objective lens.
The internal battery can be charged using the USB cable . The external battery can be charged via the USB cable when installed in the device or using the APS5 battery charger (available separately).
Firmware updates via WiFi are not planned for the AxionXQ LRF in the near future. If needed, firmware updates may be downloaded via USB connection.
If your thermal device is not displaying heat signatures and only shows a uniform background, there may be an issue with the thermal sensor . What to do: Restart the device and check if the issue persists. Ensure the lens is unobstructed and not covered by dirt or condensation. If the problem continues, contact your seller or an official distributor in your country for an inspection.
Pulsar products feature 3-year warranty starting from the date of purchase. If no purchase receipt is available and warranty card is not filled, warranty will start from the date of manufacturing plus 6 months. The warranty period for rechargeable batteries/units (including those included into the package) is one year. More information about warranty:
Quick answer Calibration removes image flaws and stabilizes the microbolometer’s background temperature. The longer the device runs, the less frequently calibration is needed. Calibration ensures optimal image quality by leveling the background temperature of the microbolometer and eliminating image flaws such as: Vertical stripes Ghost images of previous objects How often is calibration needed? The longer a thermal imager operates continuously , the less frequent calibration is required. Calibration intervals depend on operating conditions and image quality.
If the device fails to calibrate automatically, follow these steps: Press the calibration button again: The shutter should activate, resolving the issue. If the problem persists: Contact your seller or the official distributor in your country to have the device inspected and repaired.
Helion is designed for thermal imaging but doesn’t include a temperature measurement function. If you need precise temperature readings, you might want to look into specialized thermal cameras.
Helion series can be used with both hands, but the hand strap cannot be placed on the left side.
No, the Helion is a handheld device and cannot be used as a riflescope.
Helion monoculars are equipped with ULIS thermal sensors from France , known for their high performance and reliability.
Quick answer Download the Stream Vision app, connect your AXION, check for updates, and download using mobile data or WiFi. The device will reboot once the update is installed. Follow these steps to update your Axion firmware: Step-by-step instructions: Download the Stream Vision app: Get the app for free from Google Play or the App Store . Connect tour Axion device to your smartphone or tablet: Ensure a stable connection between your Axion and mobile device. Launch the Stream Vision app: Go to the “My devices” section. Select your Axion device and press “Check updates.” Download and install the update: If your Axion is connected to your phone, enable Mobile data transfer (GPRS/3G/4G/5G) to download the update. If your Axion is listed in “My Devices” but not connected, you can use WiFi to download the update. Complete the Update Process: Wait for the update to download and install. The device will automatically reboot once the installation is complete. Additional Help: For detailed guidance, watch the video instructions .
Quick answer Distance accuracy depends on target reflectivity, environmental conditions, and stabilization. Use a tripod or stable support for targets over 400 meters. The accuracy of distance measurement depends on several factors: 1. Target reflectivity: Measurement accuracy and maximum range depend on the reflection ratio of the target. Shiny or brightly colored surfaces reflect better than dark or matte surfaces . Target size and shape also affect reflectivity. 2. Environmental conditions: Accuracy can be impacted by fog, haze, rain, snow, and lighting conditions . Performance may decrease in bright sunlight or when measuring distance towards the sun . 3. Target size and distance: Small targets are harder to measure than larger ones. For targets over 400 meters , use a tripod or stabilize by resting your elbow on a solid surface to reduce hand tremors and improve accuracy.
Quick answer The Axion XQ30 Pro offers a better sensor (NETD < 25 mK), a larger field of view (13.3° x 10°), and improved image quality , making it a superior choice over the Axion XM30F . The Axion XQ30 Pro offers superior image quality, field of view, and thermal sensitivity compared to the Axion XM30F . Key differences: Thermal sensor & sensitivity: Axion XQ30 Pro: 384×288 px @ 17 µm , sNETD < 20 mK (professional-grade sensor). Axion XM30F: 320×240 px @ 12 µm. Advantage: The XQ30 Pro provides better image detail, contrast, and low noise levels in challenging conditions. Field of view (FOV): Axion XQ30 Pro: 13.3° x 10° (wider FOV). Axion XM30F: 7.8° x 5.9° . Advantage: The XQ30 Pro offers nearly twice the field of view , improving situational awareness. Magnification & zoom: Axion XQ30 Pro: 2-8x (4x zoom) . Axion XM30F: 3-12x (4x zoom) . Advantage: The XQ30 Pro has a lower base magnification , providing a wider perspective and easier target acquisition.
No, the Axion line does not support interchangeable lenses. It is not possible to replace the lens with a 1x magnification option.
Quick answer Yes, the Axion can be used with eyeglasses, but folding back the elastic eye shade or using the diopter adjustment for direct viewing is recommended. Yes, the Axion can be used with eyeglasses. However, due to its compact design , there are a few considerations: Folding the eye shade: For eyeglass wearers, folding back the edge of the elastic eye shade can help increase the field of view. Diopter adjustment: The Axion features a +/-5 diopter adjustment , allowing you to use the device without eyeglasses while enjoying the full field of view.
The battery charge percentage is only visible in the status bar of the Axion monocular when the display is on. For devices that are off: You cannot see the exact charge percentage. You can check if the battery is charging by observing the LED diode located next to the eyepiece. Additional help: For more details, refer to the user manual .
No, the Axion LRF XQ is designed as a handheld thermal imaging device and is not intended for rifle mounting .
No, the Axion is designed as a handheld thermal imaging device and is not intended for rifle mounting .
The Axion XQ30 Pro has a shorter lens focal length, which results in a shorter detection range. Both devices use the same 384×288 px @ 17 µm sensor, but the XQ30 Pro has a detection range of 1050 m.
No, it is not possible. Please use AXION 2 XQ35 LRF if you need a laser rangefinder.
Yes, all Pulsar products, including the Axion XQ LRF , use a Class 1 Safety laser (standard IEC60825-1:2014), which is harmless to the eyes. Important note: Even though the laser is safe, it’s best to avoid looking directly into the emitting lens of the rangefinder.
The Axion XQ30 Pro does not feature a laser rangefinder (LRF). However, it includes a stadiametric rangefinder , which allows users to estimate the approximate distance to an object of a known size with reasonable accuracy. For a laser rangefinder option: If you need a device with an LRF , consider the Axion 2 LRF models , which come equipped with a built-in laser rangefinder for precise distance measurement.
Follow these steps to update your Axion firmware: Step-by-step instructions: Download the Stream Vision app: Get the app for free from Google Play or the App Store . Connect your Axion to your smartphone or tablet: Ensure a stable connection between your Axion and mobile device. Launch the Stream Vision app: Go to the “My Devices” section. Select your Axion device and press “Check Updates.” Download and unstall the epdate: If your Axion is connected to your phone, enable Mobile Data Transfer (GPRS/3G/4G/5G) to download the update. If your AXIAxionON is listed in “My Devices” but not connected, you can use WiFi to download the update. Complete the update process: Wait for the update to download and install. The device will automatically reboot once the installation is complete. Additional help: For detailed guidance, watch the video instructions .
Quick answer Fold back the elastic eye shade for a wider field of view, or use the +/-5 diopter adjustment to operate the device without eyeglasses. The Axion Key is designed as an ultra-compact, feature-rich device, which may require some adjustments for eyeglass wearers. Tips for comfortable use with eyeglasses: Fold back the elastic eye shade: This increases the field of view, making it easier to see the display. Use the diopter adjustment (+/-5): Adjust the diopter settings to compensate for vision differences. This allows use without eyeglasses while maintaining a full field of view.
The Axion Key does not have an external full-charge indicator when charging directly without a charge base (available as an accessory but not included in the package). How to check the battery status: If the device is turned on: The battery icon in the status bar will display the charge percentage while charging. If the device is off: There is no external indication of full charge. Charging time: Keep the device connected to the wall charger for approximately 1.5–2 hours to fully charge the battery.
If your firmware version is 1.0.26 or higher (e.g., 2.0.09 or 2.0.14 ), an update is not required , and the system may display a message indicating driver incompatibility.
My Telos LRF is not measuring distance correctly. Please take note of the following: Accuracy of measurement and maximum range depend on the reflection ratio of the target surface, the angle at which the emitting beam falls on the target surface and environmental conditions. Reflectivity is also affected by surface texture, colour, size and the shape of the target. A shiny or brightly coloured surface is normally more reflective than a dark surface. Measuring range to a small sized target is more difficult than to a large target. Accuracy of the measurement can also be affected by light conditions, fog, haze, rain, snow etc. Ranging performance can degrade in bright conditions or when ranging towards the sun. When measuring range to a small-sized target located more that 400 meters away, it is recommended that you put your elbow against a solid surface. This is due to possible hand tremors and difficulty hitting the target with the beam at a longer distance.
You need to use the Telos tripod adapter (sold separately). It is equipped with a 1/4″ tripod mount on the bottom plane.
Quick answer The Telos XG50 has higher magnification and a longer detection range , while the Telos XP50 offers better thermal sensitivity and a wider field of view for more detailed imaging. The Telos XP50 and Telos XG50 differ in pixel pitch, thermal sensitivity, magnification, field of view, and detection range. Key differences: Feature Telos XG50 Telos XP50 Pixel Pitch 12 µm 17 µm Thermal sensitivity (sNETD) <20 mK <15 mK Base optical magnification 3.5x 2.5x Field of view (FOV) 8.8° 12.4° Detection range 2300m 1800m Which one to choose? Telos XG50 offers higher base magnification and longer detection range (2300m) , making it ideal for long-distance observation . Telos XP50 provides better thermal sensitivity (NETD <18 mK) and a wider field of view , delivering sharper images and enhanced contrast in challenging conditions .
Quick answer The Telos XP50 has higher resolution, better thermal sensitivity, and a longer detection range , while the Telos XQ35 is more compact, lightweight, and has a wider field of view . The Telos XP50 and Telos XQ35 differ in sensor resolution, thermal sensitivity, magnification, field of view, detection range, and size. Key differences: Feature Telos XQ35 Telos XP50 Sensor resolution 384×288 px 640×480 px Thermal sensitivity (sNETD) <18 mK <15 mK Base optical magnification 2.5x 3x Field of view (FOV) 10.7° 12.4° Detection range 1300m 1800m Dimensions (mm) 224 x 66 x 59 238 x 72 x 62 Weight 570g 670g Which one to choose? Telos XQ35 is more compact and lightweight , with a wider field of view and lower base magnification , making it ideal for broader area scanning . Telos XP50 offers a higher resolution sensor , better thermal sensitivity , and greater detection range , making it better for detailed observation at long distances .
Quick answer Telos monoculars are the only Pulsar Vision devices with upgrade options. Check our upgradeability page for details. The Telos series is our first line of upgradeable monoculars , allowing you to upgrade specific components like the sensor, lens, or add an integrated laser rangefinder—without the need to buy an entirely new device. For details on Telos upgrade options , pricing, and turnaround times, please visit our upgradeability page . Currently, Telos is the only Pulsar Vision device series with technical upgrade options.
Yes, the Telos LRF can be mounted on a tripod, but you will need the Telos tripod adapter (sold separately). Tripod mounting details: The Telos tripod adapter features a 1/4″ tripod mount , located on the bottom plane of the adapter. Once attached, it allows for stable hands-free use of the Telos device. See detailed mounting instructions here .
Quick answer The device’s warranty remains unchanged, but upgraded parts come with a new three-year warranty . Upgrading your Telos device does not extend the warranty for the entire device. However, you will receive a renewed three-year warranty for the upgraded parts.
Simply hand your device over to your dealer or distributor, and they will take care of the shipping process for you.
Here’s how the Telos Upgrade process flows step by step: Decide on your upgrade – Choose the parts you’d like to upgrade. Contact your local dealer or distributor – Reach out to get a quote for the upgrade. Hand over your device – Give your device to your dealer or distributor. Upgrade in progress – Your device will be sent to the manufacturing facility for the upgrade. Receive your upgraded device – Once the process is complete, your upgraded Telos device will be returned to you.
We aim to complete the upgrade process as quickly as possible. However, you should plan for a 30-day turnaround time for your device.
The upgrade system is about boosting and improving your Telos, so downgrading your monocular is not possible .
The laser rangefinder (LRF) cannot be removed from the Telos LRF XG . However, an upgrade option is available for adding an LRF to certain models. If you prefer a version without a laser rangefinder, consider the Telos XG model.
The upgradeability concept and possibility are only applied to Telos thermal imaging monoculars . At the moment, the Oryx LRF line does not have this option.
Yes, the Telos LRF is designed for both left- and right-handed users , allowing comfortable operation with either hand.
When handing your device to the dealer, only bring the monocular itself and, if available, the carrying case . There’s no need to include the charger, battery, or other accessories. The dealer will take care of further packing and shipping.
Quick answer The Telos LRF uses a 6400 mAh Li-Ion LPS 7i battery , which can be charged via wireless induction charging (remove battery cap) or USB Type-C connection . The Telos LRF is powered by a LPS 7i Li-Ion battery pack with a capacity of 6400 mAh . Charging options: Wireless charging: Use a standard wireless induction charger . Important: Remove the battery cap before charging. Wired charging: Connect the battery directly to a network adapter via the USB Type-C port .
Quick answer Replaced parts are recycled or disposed of by Pulsar and cannot be retrieved, even if the upgraded device is returned. Once your Telos device is upgraded, the replaced parts become the property of Pulsar. These parts are either responsibly recycled or disposed of. If you choose to return the upgraded device according to the terms and conditions, you’ll receive a refund for the amount you paid. However, it won’t be possible to retrieve the old parts.
Quick answer Potential upgrades include s ensor, l aser rangefinder, and o bjective lens. The parts of your Telos device that can be upgraded depend on the specific model. Potential upgrades include: Sensor Laser Rangefinder (LRF) – if your current model does not have an integrated LRF Objective Lens Be sure to check the upgrade options available for your specific Telos model here .
You will receive an invoice by email once your device has been processed and upgraded at our manufacturing facility. The invoice will be sent along with the upgraded device.
All Telos models, except the Telos LRF XL50 , are eligible for an upgrade. To check the full list of eligible models and upgrade options, please refer to the Telos upgrade map .
Anyone who owns a Telos device that qualifies for an upgrade can participate in the Upgrade Program.
What does it mean? Telos is the first thermal imaging line designed for technical future upgrades . You can enhance key components like optics or sensors , ensuring your device stays up to date with the latest technology. Plus, for non-LRF models, the upgradeability option allows to add a laser rangefinder.
The minimum focusing distance of the Telos XG50 is 5 meters .
The minimum focusing distance of the Telos XP50 is 5 meters .
The minimum focusing distance of the Telos XQ35 is 5 meters .
It uses Lynred thermal sensor (France) 640×480 pixels @ 12 um (NETD less than 40 mK).
The Telos XQ35 is equipped with a Lynred thermal sensor (France) featuring: Resolution: 384×288 pixels Pixel Pitch: 17 µm Thermal Sensitivity (sNETD): <
Right now, Telos offers only 35 mm and 50 mm lens options. Interchangeable lenses aren’t available separately as accessories or spare parts. Any future updates will be part of the Upgradable Device program .
No, the Axion 2 XQ35 cannot be equipped with a rangefinder. Alternative models with a rangefinder: If you need a laser rangefinder (LRF), consider the Oryx LRF or the Telos LRF series.
The Helion 2 Pro is a purely handheld device that cannot be mounted on a riflescope.
Yes, you can charge your Helion 2 by connecting it via the supplied USB cable to a 12V car adapter . Recommendation: Use a car adapter with an output of 2A for optimal charging speed. Adapters with lower output will result in longer charging times.
It is not possible to use replaceable Helion lenses with the Helion 2 Series .
It is not possible to use replaceable Helion lenses with the Helion 2 XP50 Pro .
The calibration sound in the Helion 2 is louder because it uses an alternative sensor . This is not a defect and does not affect device performance. Options for reducing noise: It is not possible to make the sound quieter. For complete silence, we recommend using the manual silent mode available in the device settings.
Quick answer The Helion 2 XP Pro offers superior thermal sensitivity (NETD < 25 mK) and an F50/1.0 improved objective lens , enhancing image clarity and detection in extreme conditions. The Helion 2 XP Pro offers enhanced temperature sensitivity and an improved objective lens for superior image quality. Key differences: Thermal sensitivity: Helion 2 XP Pro: Extreme thermal sensitivity , allowing detection of the smallest temperature differences. Helion 2: Standard thermal sensitivity. Advantage: The XP Pro provides better contrast and detail , even in low-contrast conditions (rain, fog, high humidity). Improved objective lens: Helion 2 XP Pro: F50/1.0 objective lens with enhanced thermal energy transmissivity for a clearer image. Advantage: Better light transmission results in brighter and more detailed thermal images . Full specifications: For a detailed comparison, check the Helion 2 XP Pro Specifications .
Quick answer The Telos LRF XP50 features a more sensitive sensor (NETD <18 mK), a built-in 1000m laser rangefinder, 64 GB storage, dual-band Wi-Fi, USB Type-C, and a reinforced rubberized body , making it a more advanced option than the Helion 2 XP50 Pro . The Telos LRF XP50 offers several upgrades over the Helion 2 XP50 Pro , including a more sensitive sensor, built-in rangefinder, and enhanced connectivity. Key differences: Thermal sensor & sensitivity: Telos LRF XP50: 640×480 px @ 17 µm , s NETD < 15 mK (ultra-sensitive sensor for high-contrast images in harsh conditions). Helion 2 XP50 Pro: 640×480 px @ 17 µm . Advantage: The Telos LRF XP50 provides better contrast and detail, even in extreme weather conditions . Built-in laser rangefinder (LRF): Telos LRF XP50: Yes , with a measuring range of 1000 m . Helion 2 XP50 Pro: No LRF included . Advantage: The Telos LRF XP50 integrates a laser rangefinder for precise distance measurement. Internal memory: Telos LRF XP50: 64 GB storage . Helion 2 XP50 Pro: 16 GB storage . Advantage: The Telos LRF XP50 offers 4x more internal storage for video and images. Connectivity & ports: Telos LRF XP50: Dual-band Wi-Fi (2.4 GHz / 5 GHz) for stable connections, USB Type-C. Helion 2 XP50 Pro: Single-band Wi-Fi (2.4 GHz), Micro-USB. Advantage: The Telos LRF XP50 provides faster wireless connectivity and modern USB Type-C charging . Build & design: Telos LRF XP50: Rubber-armored reinforced...
Yes, the Telos LRF can be mounted on a tripod, but you will need the Telos tripod adapter (sold separately). Tripod mounting details: The Telos tripod adapter features a 1/4″ tripod mount , located on the bottom plane of the adapter. Once attached, it allows for stable hands-free use of the Telos device. For detailed mounting instructions, click here .
Yes, the Telos LRF can be mounted on a tripod, but you will need the Telos tripod adapter (sold separately). Tripod mounting details: The Telos tripod adapter features a 1/4″ tripod mount , located on the bottom plane of the adapter. Once attached, it allows for stable hands-free use of the Telos device.
The laser rangefinder (LRF) cannot be removed from the Telos LRF XP50 . However, an upgrade option is available for adding an LRF to certain models. If you prefer a version without a laser rangefinder, consider the Telos XP50 model.
Telos LRF XP50 uses Lynred thermal sensor (France) 640×480 pixels @ 17 um (NETD less than 18 mK).
Yes, the clip can be installed both on the left or on the right side of the Oryx LRF housing. You just need to use the hexagonal spanner, supplied with the device, and secure the clip with the screw.
No, the Oryx LRF is designed as a handheld thermal imaging device and is not intended for rifle mounting .
Compared to AXION XG35 Compact, Oryx LRF XG35 has the following advantages: Powerful next-gen built-in laser rangefinder featuring 1500 m measuring distance . AMOLED display with higher resolution – 1024×768 pix . ORYX LRF XG35 is the first Pulsar monocular with a digital image stabilization feature . Image stabilization eliminates motion blur and the effects of shaky hands, reduces eye strain, and improves comfort during prolonged use, especially on moving platforms like vehicles or boats, by keeping the image steady despite external motion . ORYX LRF XG35 guarantees up to 12 operating hours thanks to the dual battery system, combining an integrated internal battery and a removable external battery APS5. Please note that the actual operating time depends on the intensity of using Wi-Fi, video recorder, laser rangefinder, and other features . 9 color palettes (additional Green color palette ). Improved protection rating – IP67 – which means that Oryx LRF is both water and dust-resistant. Modern, functional design : The Oryx LRF has an ambidextrous, symmetrical housing design, ensuring one-hand operation . The removable belt-clip and hand strap can be attached to either side of the housing allowing users to customize the device to their preferences. Meanwhile, the focusing wheel is placed next to the eyepiece, allowing users to focus the image with the same hand that’s holding the monocular. Thermal Imaging Monoculars Common…
Oryx LRF XG35 monoculars use a new-generation professional-grade, European-made thermal imaging 12-micron 640×480 pixel thermal sensor which provides high-definition image quality.
The image freezes during calibration – this is normal. Use Automatic mode by default. Close lens cover before manual calibration.
No, a clicking sound is normal in automatic and semiautomatic calibration modes.
Calibration levels the background temperature of the microbolometer and eliminates image flaws. There are defective pixels on my thermal attachment screen. You may try repairing the pixels using the respective menu item. Refer to the user manual.
User Mode saves selected brightness and contrast settings providing optimal image quality for the next use. It remains active until the user disables it. My image is blurry or out of focus (attachment). Adjust diopter on the eyepiece, adjust lens focus, do image calibration, select suitable observation mode (Forest, Rocks, or Identification), go through different color palettes, adjust contrast and brightness at similar levels, and try Image Detail Boost on and off.
You are using manual calibration mode without closing the lens cover. Close the lens cover or switch to automatic mode.
Make sure the attachment is installed correctly using the correct PSP adapter and insert ring, your rifle is zeroed correctly, and try the display calibration function.
Quick answer Thermal attachments are export-sensitive items, especially if traveling outside the EU. Import licenses may also be required depending on the destination country. Thermal attachments are classified as dual-use items, making them export-sensitive if transported outside the EU. Additionally, some countries may require you to apply for an import license upon entry. To ensure compliance, it’s recommended to contact the customs service of your destination country to confirm any restrictions or requirements regarding the import of thermal devices as personal belongings.
All Pulsar digital and thermal attachments are designed to withstand a maximum shock resistance of 6000 Joules. Before using them with the SCAR 17s or similar high-recoil rifles, ensure that your rifle’s cartridges do not exceed this value. This will help maintain the attachment’s performance and durability.
If your attachment is not holding zero, follow these steps to resolve the issue: Update firmware: Verify that your attachment is running the latest firmware version. Click here to check and update if necessary. Correct installation: Ensure the attachment is securely and properly mounted on your rifle. Loose installation can affect zero retention. Zeroing procedure: Double-check that you have followed the zeroing procedure outlined in the user manual.
Yes, the attachment offers three zeroing profiles, allowing you to use it with various rifles. For more detailed instructions, refer to the user manual.
No, Krypton is not outfitted with a tripod mount.
Quick answer Yes, user zeroing profiles are preserved after a firmware update. Yes, when updating the attachment’s firmware, all user zeroing profiles are securely retained. This ensures that your customized settings remain intact, eliminating the need to reconfigure them after an update.
Quick answer Yes, the Krypton 2 can be used on air or pellet guns, as long as the cartridges’ energy does not exceed 6000 Joules. Yes, the Krypton 2 is compatible with air and pellet guns. It features a maximum shock resistance of 6000 Joules, so ensure your cartridges’ energy does not exceed this value. Proper installation is also essential for safe and effective use.
Quick answer No, the PSP adapter must be removed to use the 3x20B monocular with the attachment. No, it’s not possible to use the 3x20B monocular without first removing the PSP adapter. This is required to ensure proper compatibility and functionality when attaching the monocular.
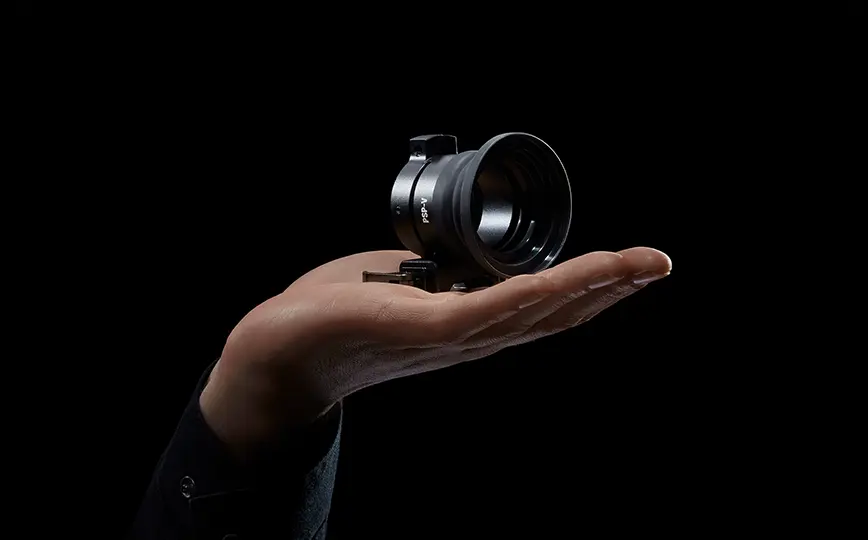
Quick answer Yes, the Krypton 2 can be mounted on a Picatinny rail using the PSP-V adapter. Yes, the Krypton 2 is compatible with Picatinny rails when paired with the PSP-V adapter. This setup allows you to mount the Krypton 2 in front of optical attachment lenses on hunting and sporting weapons, including those based on MSR (Modern Sporting Rifles) and AR-15 platforms.
Quick answer Yes, the Krypton 2 can be used as a handheld monocular with the 3x20B monocular, which is sold separately. Yes, the Krypton 2 is versatile and can function as a handheld monocular. To use it in this mode, you will need the 3x20B monocular accessory. Please note that this item is sold separately and is not included with the Krypton 2.
Quick answer Yes, you can power the attachment using a 12V car adapter with a 5V/2A output. Yes, the attachment can be powered using a 12V car adapter as long as it features a 5V/2A output. This makes it convenient for use during outdoor trips or in vehicles. Always ensure that the adapter meets the recommended specifications to avoid any operational issues.
Quick answer No, the Krypton attachment does not require zeroing; you only need to zero your day sight. No, there is no need to zero the Krypton attachment. Instead, you only need to zero your day sight for accurate performance. Ensure that the Krypton is installed correctly according to the user manual for optimal results.
Quick answer Yes, the attachment supports wireless remote control. Yes, the attachment is compatible with a wireless remote control, allowing for convenient operation. To ensure full functionality, make sure your device is updated with the latest firmware. For more information, refer to the remote control setup guide or check the latest firmware updates .
Quick answer Check the attachment’s installation, the PSP adapter, your rifle’s zeroing, and consider using the display calibration function. If you’re having issues with the point of impact, follow these steps: Attachment installation: Ensure the attachment is installed correctly and that you’re using the appropriate PSP adapter and insert ring. Rifle zeroing: Confirm that your rifle is properly zeroed. Display calibration: Use the display calibration function to fine-tune performance. Refer to the user manual for detailed instructions. These checks can help address and resolve point-of-impact issues effectively.
Quick answer Thermal riflescopes are export-sensitive and may require an import license. Check with the customs service of your destination country for details. Thermal riflescopes are classified as dual-use items , which means they are export-sensitive if taken outside the EU. Additionally, some countries may require you to apply for an import license when entering with such equipment. To avoid any issues, it’s important to contact the customs service of your destination country to check if there are any specific restrictions for importing thermal riflescopes as personal belongings.
If your riflescope is not holding zero, please check the following: Firmware update : Ensure your riflescope is running the latest firmware version. Click here to check for updates. Installation : Verify that the riflescope is properly and securely mounted on your rifle. Zeroing procedure : Confirm that you have followed the correct zeroing procedure as outlined in the user manual.
The recommended torque setting for the mounting rings to install the Thermion Duo is up to 2.5 Nm .
Yes, the Thermion Duo riflescope is compatible with the Bluetooth remote control. Click here to find out how to activate wireless remote control.
Quick answer “DUO” refers to the riflescope’s multispectral capability to display digital and thermal images, including simultaneous viewing with PiP mode. “Duo” indicates that the riflescope has multispectral functionality , allowing it to produce both digital and thermal images . Additionally, both image types can be viewed simultaneously using the Picture-in-Picture (PiP) mode, with one image displayed on the main screen and the other in the PiP window.
Quick answer No, external rangefinders cannot be installed, but the riflescope includes a built-in stadiametric rangefinder for manual distance measurement. No, the riflescope does not support the installation of an external laser rangefinder. However, it features a stadiametric rangefinder , which allows for manual measurement of an approximate distance to an object. For more details, click here.
No, the riflescope does not allow installing an external rangefinder. It features a stadiametric rangefinder for approximate distance measurement. The image of the Thermion DUO digital channel has become black and white. When illumination level goes down, the digital channel automatically switches to black-and-white mode to reduce color noise. Move the riflescope to a location with sufficient light level for a color image.
IR illuminators are not compatible with the Thermion Duo because the digital channel is specifically designed for daytime use.
Yes, Thermion Duo can be used on air/pellet guns. Please make sure you follow all installation instructions. Thermion Duo features a max. shock resistance of 6000 Joules. Please check this value for your cartridges.
When the illumination level drops, the riflescope’s digital channel automatically switches to black-and-white mode. This adjustment helps reduce color noise in low-light conditions. To restore the color image, move the riflescope to an area with sufficient lighting.
Quick answer The digital and thermal channels must be zeroed separately. Follow the instructions to ensure accuracy. The riflescope requires separate zeroing for the digital channel and the thermal imaging channel . This ensures accuracy for both modes of operation. If one of the channels is not properly zeroed, you will not be able to hit your target. Please follow the instructions to complete the zeroing process for both channels.
You need to zero the digital and thermal imaging channels separately. If zeroing is not performed in one of the channels, you will not be able to hit the target.
Quick answer The flare is caused by heat from a compensator or silencer. Raise the riflescope height and re-zero it to fix the issue. A semi-circular flare at the bottom of the thermal image after a shot is likely caused by heat radiating from a compensator or silencer attached to the firearm. To eliminate this issue, it is recommended to raise the height of the riflescope so the flare is no longer visible. After adjusting the height, you’ll need to re-zero the riflescope to ensure accuracy.
The image freezes during calibration – this is normal. Default calibration mode is Automatic but you can change it to Manual mode in the main menu. Please close the lens cover prior to manual calibration.
Yes, you can power your riflescope using a 12V car adapter, but ensure that it has a 5V / 2A output for compatibility.
The internal battery can only be replaced at an authorized service center . To arrange a replacement, please contact your seller or national distributor to initiate the return for repair.
Uploading new reticles to the riflescope is not possible. However, you can submit a proposal for a reticle type, and we will review it for consideration in future updates.
Quick answer Yes, Pulsar riflescopes can handle up to 6,000 Joules of recoil. Check your cartridge specs to confirm compatibility. Yes, Pulsar digital and thermal riflescopes are designed to handle a maximum shock resistance of 6,000 Joules . To ensure compatibility, please verify the energy level of the cartridges you plan to use with your SCAR 17s rifle.
Thermion does not support BPS battery pack for regular AA batteries. It uses an internal non-removable battery APS3 (3200 mAh) and an external battery APS2 (2000 mAh).
No, the riflescope does not include a recoil-activated video recording feature. You can use the standard video recording function to capture footage manually.
Yes, your user zeroing profiles are securely saved, even if the battery is removed from the riflescope for an extended period of time.
The proximity sensor can be activated or deactivated through the device main menu.
You may change color palettes through long pressing the LEFT button or via the main menu.
Quick answer The clicking sound is normal in automatic and semi-automatic calibration. Use manual calibration mode to avoid it. The clicking sound is normal during automatic and semi-automatic calibration modes. If you’d like to avoid the sound, you can switch to manual calibration mode . Be sure to close the lens cover during manual calibration to prevent ghost images from appearing on the display.
When using digital zoom, image is cropped so resolution will become lower and the image will look not as clear as when using the base (optic) magnification. It’s a peculiarity of digital zoom in all devices, and it’s not a defect.
Ensure the lid of the battery container is securely closed. When closing the lid, make sure the lid lock is in the leftmost position to maintain a proper connection. (Refer to the provided image for guidance.) When closing the cover, make sure you hear a click – this will esnure the lid is fully closed and prevent power interruption when shooting.
If your riflescope is not holding zero, please check the following: Firmware Update : Ensure your riflescope is running the latest firmware version. Click here to check for updates. Installation : Verify that the riflescope is properly and securely mounted on your rifle. Zeroing Procedure : Confirm that you have followed the correct zeroing procedure as outlined in the user manual .
Quick answer Yes, it’s normal. The rangefinding reticle is always centered, while the aiming reticle’s position depends on the mounting and zeroing process. Yes, this is normal. The rangefinding reticle is always positioned at the center of the field of view and is not intended for shooting purposes. The aiming reticle , however, may not be perfectly centered in the field of view after the zeroing procedure. This is influenced by the type of mount used and whether the riflescope is mounted and tightened correctly on the rifle.
The proximity sensor automatically turns the display on or off when the scope is moved away from or brought close to the user’s eye, helping save battery power and reduce unwanted light emission.
Quick answer User Mode saves your brightness and contrast settings, ensuring optimal image quality without repeated adjustments. It stores settings for each observation mode, even when temporarily disabled. The User Mode allows you to save your preferred brightness and contrast settings directly to the device’s memory. This ensures optimal image quality without needing additional adjustments every time you use the thermal imager. The function is enabled via the main menu and stays active until manually disabled. While active, the device saves the most recent brightness and contrast settings for each observation mode. These settings remain stored even if you temporarily disable User Mode. Reactivating it will restore your previously saved settings. This feature is designed for convenience and consistency, providing you with the best possible image quality tailored to your preferences.
Quick answer Non-functional pixels (up to 0.5% of total) are normal. Use the pixel repair option in the menu to fix them or refer to the manual for guidance. A small number of non-functional pixels (up to 0.5% of the total pixel count ) is considered normal and does not indicate a defect. However, you can attempt to repair defective pixels using the pixel repair feature in your device’s menu. Here’s how to repair pixels: Access the pixel repair menu : Refer to your thermal imager’s user manual for detailed steps. View sample video instructions here . Use Picture-in-Picture (PiP) mode : Activate the pixel repair option to open a PiP window with an auxiliary cross. Use the navigation buttons to move the cross to the defective pixel’s coordinates. Fix the pixel : The defective pixel will disappear when the auxiliary cross is correctly aligned. Press the ON/OFF button and wait for the “OK” message to confirm the repair. If the issue persists, consult the user manual or contact support for further assistance.
Certain Thermion riflescopes support remote control functionality via the Pulsar BT Wireless Bluetooth Remote Control . These models include: Thermion 2 LRF 50 line, Thermion 2 50 line, Thermion 2 LRF 60 line. Remember, you can also operate your riflescope remotely using the Stream Vision 2 app , available on:
Calibration levels the background temperature of the microbolometer and eliminates image flaws such as vertical stripes and ghost images. The longer a thermal imager operates nonstop, the less frequently calibration is required. There are defective pixels (or pixel clusters) on the screen of my thermal imaging device. A certain amount of non-functional pixels (max 0.5% of total quantity) is allowed and is not considered a defect. You may try repairing the pixels using the respective menu item. Activate the pixel repair option, move the auxiliary cross to the bad pixel’s coordinates, and press ON/OFF to confirm.
This issue occurs if you’re using manual calibration mode without closing the lens cover. To fix this: Ensure the lens cover is closed during manual calibration. Alternatively, switch to automatic calibration mode if you prefer not to close the cover.
Quick answer Calibration ensures clear imaging by balancing the microbolometer’s temperature and removing flaws like stripes or ghost images. Image calibration is essential because it balances the background temperature of the microbolometer and eliminates flaws such as vertical stripes and ghost images of previously viewed objects. The frequency of calibration depends on the operating time of the device. The longer the thermal imager runs continuously, the less frequently calibration is needed.
Quick answer Blurry images can be fixed by adjusting the diopter, focusing the lens, performing image calibration, selecting the right amplification and color modes, and fine-tuning contrast and brightness. If your image is blurry or out of focus, try the following steps to adjust and improve the clarity: Adjust the diopter : Use the diopter adjustment on the eyepiece to make the icons on the display and status bar appear sharp. Focus the lens : Adjust the lens focus to clearly view your target. Remember, re-focusing may be necessary as the distance to the object changes. Perform image calibration : Calibrate the image using either manual mode (with the lens cover closed) or automatic mode . Choose the right amplification level : Select the most suitable level— Normal , High , or Ultra —based on the observation conditions. Explore color modes : Cycle through the different color modes to find the one that works best for your environment. Adjust contrast and brightness : Manually adjust these settings, ensuring they remain at similar levels. A large difference between contrast and brightness can negatively affect image quality.
Quick answer Distance measurement accuracy depends on target reflectivity, environmental conditions, and hand stability. Use a stable surface for long-range measurements to small targets. If your riflescope is not measuring distance accurately, consider the following factors: Target Reflectivity : Measurement accuracy depends on the reflection ratio of the target surface, which is influenced by: Texture, color, and shape : Shiny or bright surfaces are typically more reflective than dark or dull ones. Target size : Measuring range to small targets is harder than to large ones. Environmental Conditions : Light conditions, fog, haze, rain, snow, or bright sunlight (especially when measuring towards the sun) can impact ranging performance. Hand Stability : When targeting objects over 400 meters away , especially small ones, hand tremors can affect accuracy. Rest your elbow on a solid surface to stabilize the device and improve accuracy. By addressing these factors, you can optimize your riflescope’s distance measurement performance.
Quick answer An off-center reticle after zeroing is normal and does not impact accuracy. Proper installation and a secure mount help keep the reticle closer to the center. It is normal for the reticle to appear slightly off-center in the field of view after zeroing. This does not affect the accuracy of the riflescope. If the riflescope is installed correctly on your rifle and the mount is securely fixed, the reticle will likely require minimal adjustment during zeroing and will remain closer to the center.
Yes, but you need to update your riflescope’s firmware to enable compatibility with the Stream Vision Ballistics app. How to Update Firmware: Follow this Quick Guide to Firmware Installation .
The recommended torque setting for mounting rings to install the Thermion 2 riflescope is up to 2.5 Nm .
Yes, the Thermion 2 riflescope is designed for use both day and night , and it performs reliably in various weather conditions, including fog, rain, and mist.
Quick answer Use 30 mm compatible rings. Choose sturdy, low-profile rings, or consider Innomount mounts designed for Pulsar riflescopes. The Thermion 2 riflescope is compatible with all types of 30 mm mounting rings and mounts . While there are no specific recommendations, here are some key considerations: Use high-quality rings that are sturdy and reliable. Opt for rings that sit as low as possible to facilitate easier zeroing. Consider Innomount mounts, as this company produces mounts specifically designed for Pulsar riflescopes. Ensure the rings are suitable for the dimensions of the Thermion 2 riflescope. Taking these factors into account will help you choose the best mounting option for your riflescope.
Thermion 2 XP50 has NETD lower than 25 mK. Thermion 2 XQ38 and XQ50 feature a 384×288/17um sensor with NETD lower than 40 mK. It also features newly developed fast aperture germanium optics F/1.0 with improved heat energy transmissivity.
Yes, the Trail 3 LRF does have Recoil Activated Video Recording. Three sensitivity levels for recoil detection allow you to personalize the riflescope settings.
The scope is supplied with two sets of LPS 7i batteries. The battery is quick-replaceable. The device can also be powered by an external power source.
Spare parts can be ordered through a Pulsar official distributor in your country.
Spare parts can be ordered through a Pulsar official distributor in your country.
Please make sure that the scope is installed correctly and that the mount is securely fastened. Also, strictly follow the zeroing instructions recommended by the manufacturer.
The scope is mounted using a Weaver rail. Available options: Trail 3 LRF XQ50 with Weaver N mount, Weaver SQD mount, or Weaver LQD mount. The scope can also be supplied without a mount.
The Trail 3 LRF features a new monoblock housing design and next-generation sensor with exceptional sensitivity (sNETD less than 15 or 18 depending on model). It includes bilateral focusing mechanism, integrated ballistic calculator, redesigned circular Picture-in-Picture mode, and is powered by the high-capacity LPS 7i battery.
Yes, the Talion riflescope can safely be used on air or pellet guns. However, please ensure you: Follow the detailed installation instructions here . Confirm that your cartridges do not exceed the Talion’s maximum shock resistance of 6,000 Joules .
Yes, you can use Talion in any weather conditions (fog, rain, mist etc.), night and day. My image is blurry or is out of focus. Please adjust the diopter on the eyepiece to see display icons clearly, adjust the lens focus, do image calibration, choose the most suitable amplification level, go through different color modes, and adjust display contrast and brightness keeping them at similar levels.
To install the Talion riflescope, use one of the following special mounts : Weaver U Weaver USQD Weaver LQD For detailed installation instructions, please refer to the guide available here.
Quick answer Key Talion features include a multi-point mount, lightweight housing, three sensitivity levels, 9-hour battery life, rapid battery extraction, and Stream Vision 2 compatibility. The Talion riflescope offers several highlights designed for convenience and performance: Multi-Point Prism Mount : Ensures precise positioning on your rifle for optimal comfort and accuracy. Compact Design : Makes Talion ideal for active hunts, especially stalk hunting. Lightweight Magnesium Alloy Housing : Combines durability with portability. Three Sensitivity Levels : Choose from Normal, High, or Ultra to enhance performance in different conditions. Long Battery Life : Operates for up to 9 hours on a single charge. Quick Battery Extraction : Features a rapid extraction mechanism for easy and efficient battery replacement. Stream Vision 2 Compatibility : Enables connection with the app for additional features like remote control and media sharing. For a full list of features, click here .
The recommended torque setting for installing the Talion riflescope is 4 Nm (35.4 in-lbs) .
Quick answer The Talion XQ35 Pro offers higher base magnification (2.5x), better performance in poor weather, and shorter detection range (1,350m). The Talion XG35 excels at longer ranges and is suited for drier conditions. The main differences between the Talion XQ35 Pro and Talion XG35 models include: Base magnification : Talion XQ35 Pro: 2.5x Talion XG35: 2x Sensor size and sensitivity : Talion XG35: Features a 640×480 @ 12 µm sensor , ideal for slightly longer ranges. Talion XQ35 Pro: Equipped with a 384×288 @ 17 µm sensor with a <25 NETD , offering clearer images in tough, humid conditions. Detection range : Talion XG35: 1,750 meters Talion XQ35 Pro: 1,350 meters Click value : Talion XG35: 21 mm Talion XQ35 Pro: 18 mm The Talion XG35 is better suited for dry weather and slightly longer ranges, while the Talion XQ35 Pro performs better in poor weather conditions and at shorter ranges. For a full comparison of specifications, click here .
Major differences: objective lens aperture, magnification ratio, sensor size, detection range, click value and click range.
Both models feature very similar specifications; however Thermion 2 LRF Pro has a laser rangefinder with max. range 800m.
Quick answer The Thermion 2 LRF 60 excels with a higher focal length of the lens, increased base magnification, and new eyepiece optics. The Pulsar Thermion 2 LRF 60 line has significant advantages compared to previous Thermion 2 models. The new series comes with: Focal length of the lens increased to 60 mm, Increased base magnification compared to previous models, Wide-angle eyepiece with extra-long 65 mm eye relief that’s safe with high-caliber ammunition, Smaller click value for enhanced zeroing precision. To compare all technical specifications, click here .
The Thermion 2 LRF XL50 uses the new 1024×768 @ 12 um sensor providing high definition image quality. It provides the widest FOV among Thermion 2 models at 14×10.5 degrees, allowing optimal field of view/magnification ratio even at high zoom levels up to 14x.
Yes, you can use Trail 2 LRF in any weather conditions (fog, rain, mist etc.), night and day.
The recommended clamping force is up to 2-3 Nm. Please note that applying thread sealant is very important. My Trail 2 LRF is not measuring distance correctly. Accuracy depends on reflection ratio of the target surface, angle of the emitting beam, and environmental conditions. Measuring a small sized target is more difficult. Accuracy can also be affected by light conditions, fog, haze, rain, or snow.
To use the Stream Vision Ballistics app with your Trail 2 LRF, follow these steps: Update your riflescope’s firmware: Firmware updates are required to enable compatibility with the Stream Vision Ballistics app. Watch this Quick guide to firmware installation . Ensure you have the latest version of the app: Download or update the Stream Vision Ballistics App from the Google Play Store or App Store .
Yes, you can charge an IPS/APS battery while it is installed in the device. However, for optimal results: Turn off the device before charging to ensure safety and efficiency. Charging with the supplied battery charger is recommended, as it provides a significantly faster charge compared to in-device charging.
Seeing a dim red glow at short range from invisible IR illuminators is normal. The light is not visible to most animals.
Is this normal? Quick answer If the LED on your charger stays red, leave the battery charging for several hours. If it doesn’t blink green afterward, the battery may be defective and should not be used. A continuously red LED typically indicates that the battery may be deeply discharged. Solution : Keep the battery in the charger for several hours to allow it to recover. Then, remove and re-insert the battery. If the LED starts blinking green, the battery is functioning properly. If the LED remains red, the battery is defective and should not be used for safety reasons.
IR illuminators are used with digital devices to improve image quality in low light conditions or full darkness.
Pulsar mounts are made of cast aluminum.
IR illuminators in the invisible range (e.g. 940nm) are designed for short and medium distances. IR illuminators in the visible range (e.g. 805, 850nm) are intended for medium and long distances.
The following conditions may affect battery life: 1. Low external temperature. The lower the temperature, the shorter the battery life. 2. Using the full set of additional functionality of the device: Wi-Fi, video recording, and rangefinder reduces battery life. 3. Incorrect storage: we recommend to store the battery at a charge of 40-50%. 4. Long-term storage without using the battery. The battery must be charged and discharged to maintain capacity. 5. The number of charge-discharge cycles of the battery is 500. After 500 cycles, the battery capacity decreases by 20%.
No, it is not possible to share multiple files at the same time. Files must be shared one by one. To share a file: Open the app gallery and select the downloaded file you want to share. Click on the “Share” link in the bottom-left corner of the screen.
While the app can be used on tablets, it is not fully optimized for these devices. As a result, the graphical interface may not display correctly or provide the best user experience.
No, registered users are provided with 16 GB of Cloud storage free of charge. This allows you to securely store and access your files without any additional cost.
Yes, the app includes a motion detection feature . To ensure this feature works correctly, make sure you have the latest version of the app installed.
Yes, the app works seamlessly in both portrait (vertical) and landscape (horizontal) modes. Simply rotate your phone to switch between orientations based on your preference.
Quick answer Go to your phone’s Settings > Applications , select the current default app, and deselect “Use as default.” Menu names may differ by phone model. To change the default app or location used for sharing files, follow these steps: Access your phone’s settings: Go to Settings and navigate to the Applications (or Apps ) section. Locate the current default app: Select the app (e.g., Facebook, Email, etc.) currently set as the default for sharing files. Deselect the default setting: Tap on “Use as default” (or similar) and deselect it to remove the default assignment. Note: The names and options in your phone’s menu may vary depending on the model and operating system.
Quick answer Go to “Gallery” > “Cloud” > “Authorization” to sign in using Google, Facebook, App Store, or your phone number. To register on the Cloud, follow these steps: Open the app and navigate to “Gallery” > “Cloud” > “Authorization.” Sign in using one of the following options: Google account Facebook account App Store account Phone number Important Notes: For Android users , make sure the device is not connected to the app during registration. For iOS users , signing in is possible even with a connected device.
To switch from “Guest mode” to “Owner mode” , follow these steps: Go to the Wi-Fi Settings menu on your device. Select “Access Level Setup” from the menu. Change the mode from “Guest” to “Owner.”
No, it is only possible to connect to one mobile device at a time.
Yes, there is currently a 15-digit limit for phone numbers in the registration prompt field. This limitation is temporary, and a fix is planned for an upcoming update.
If your phone is requesting a password or not accepting the entered password, follow these steps: Check the default password: The default password for Pulsar devices is 12345678 (unless changed). Verify or update the password: Navigate to “WiFi Settings” in your Pulsar device’s menu to check or change the password. Reset the password if necessary: To reset the password, go to “General Settings” > “Default Settings” on your Pulsar device.
Quick answer Manually input the ballistic data for your ammo if it’s not listed in the app. If your ammunition is not available in the app’s list, you can manually input the data. To do this: Open the app and navigate to the ammunition settings section. Select the option to add new ammo manually. Enter the required ballistic data for your specific ammunition. For detailed instructions, check our Ballistics Setup Guide.
If you’re unable to share videos via WhatsApp or Facebook, try the following steps: Check your mobile data connection: Ensure mobile data is turned on and active on your phone. Switch to a WiFi network: Disconnect your Pulsar device from your phone and connect to a WiFi network to share files more efficiently.
If you’re unable to download videos from the app to your phone, ensure the following: Check the connection: Verify that your Pulsar device is properly connected to your phone. Follow the connection instructions: Refer to the Connection Guide for step-by-step instructions to establish a stable connection.
Quick answer GPS is required for automatic reconnection and network recognition. The app does not use location data for any other purpose. Enabling GPS (Location) is necessary for the app to: Remember the network name of your device. Automatically reconnect if the connection is lost and restored. Note: The application does not collect or use location data for any other purpose. Important: Connection to your Pulsar device is not possible without turning on GPS.
Quick answer Ignore “Weak signal” or “No internet connection” messages. They do not affect your connection to the Pulsar device. These messages are normal and can be safely ignored. The Pulsar device is not a source of internet connectivity, which is why your phone displays these notifications. These messages do not affect the connection between your phone and the Pulsar device.
The ballistic calculator uses the angle/elevation readings of your riflescope to calculate the SPOA (Suggested Point of Aim) . To ensure accuracy: Keep the reticle on the target while manually entering the distance data into the calculator.
Slow or interrupted downloads may occur due to connectivity issues. Try these solutions: Check WiFi connection: Ensure your phone isn’t attempting to switch to a stronger or default WiFi network. Maintain device proximity: Keep the distance between your device and smartphone between 0.5–2 meters for a stable connection.
Quick answer Ensure GPS is enabled, disable conflicting networks, adjust app permissions, and maintain proximity (0.5–2m). If issues persist, reset your Pulsar device’s settings and reconnect with a new password. If your phone disconnects from your Pulsar device, try the following steps: General solutions: Enable GPS (Location): Ensure GPS is turned on in your phone settings. Use Flight Mode (iOS devices): Activate Flight Mode and disable mobile data transfer. Avoid conflicting WiFi networks: Turn off your home WiFi router or other strong WiFi networks and reconnect. Disable “Switch to mobile data” (Android): Turn off this feature in your phone settings to prevent automatic disconnection. Check app permissions: For Android: Allow “All permissions” for the app in your phone settings. For iOS 14 and 15: Ensure “Local Network” access is enabled in the app’s permissions. Optimize proximity: Keep the distance between your phone and the Pulsar device within 0.5–2 meters for stable performance during file transfers or firmware updates. Advanced troubleshooting: Reset Pulsar device settings: Return your Pulsar device to its default settings. Verify or reset WiFi password: Check that the password on the Pulsar device is correct, or set up a new password. Forget and reconnect the network: Delete the Pulsar device’s network from your phone. Reconnect using the correct or updated password.
If the app does not accept your verification code, try the following steps: Restart the application: Close and reopen the app, then try entering the verification code again. Use an alternative login method: If the issue persists, try accessing your Pulsar Cloud account using a Facebook , Google , or Apple account instead.
Quick answer Turn on WiFi on your Pulsar device, update the Stream Vision app, check the WiFi password, enable GPS on your phone, and repeat the connection procedure. If your Pulsar device isn’t connecting to your phone, follow these steps: Activate WiFi on your Pulsar device: Ensure WiFi is turned on. A WiFi icon with a question mark should appear in the device’s status bar. Update the Stream Vision app: Make sure you’re using the latest version of the Stream Vision app. Download or update it from Google Play or the App Store . Verify the WiFi password: Ensure the password on your Pulsar device matches the one entered on your phone. The default password is 12345678 (if unchanged). To change the password, navigate to WiFi Settings on your Pulsar device. To reset it, go to General Settings > Default Settings. Enable Location (GPS): Make sure your phone’s location services (GPS) are enabled. Repeat the connection procedure: Restart both your Pulsar device and smartphone, then follow the connection steps again.
No, Stream Vision is specifically designed for mobile devices and is not compatible with PCs or Macs.
Quick answer Download Stream Vision from Google Play (Android) or the App Store (iOS). Compatible with Android 7+ and iOS 13+. To install Stream Vision on your phone: Download the app: For Android devices, download it from Google Play . For iOS devices, download it from the App Store . Compatibility requirements: Android: Version 7.0 and higher. iOS: Version 13.0 and higher.
No, Stream Vision 2 is specifically designed for mobile devices and cannot be installed on PCs or Macs.
No, connection to PC is only for transferring files and charging. Use Stream Vision app to stream video. My device will not connect to my phone. Make sure you are using the latest Stream Vision version. Turn on WiFi in your device. Switch to 2.4 GHz WiFi bandwidth. Turn on GPS/Location on your mobile device. Turn off and on both devices and retry. Try turning on Flight mode before connecting. My phone will not stay connected to a Pulsar device. Make sure GPS/Location is on. Try Flight mode on iOS. Turn off other strong WiFi networks. Turn off Switch to mobile data option on Android. For Android, allow all app features in phone settings. For iOS 14/15, enable Local network in app permissions. My phone is asking for a password or will not accept the password. Default password is 12345678. Check and change it in WiFi Settings menu of your device. To reset, go to General settings > Default settings. Videos cannot be downloaded from the Stream Vision app to my phone. Make sure your device is connected to the phone. Video files saved to Android phone gallery cannot be played. Download file from device to Stream Vision app. Disconnect device from app. Turn on mobile data on your phone. Share the file via an external app such as WhatsApp or Telegram. File download takes too long or is interrupted. Make sure the phone is not trying to connect to another WiFi network. Keep the distance between device and smartphone within 0.5-2 meters. I cannot share my videos via WhatsApp or Facebook. Make sure mobile data is turned on in your device. Alternatively, disconnect your Pulsar device from your phone and use your WiFi network to share files.
No, Stream Vision is exclusively compatible with products from the Pulsar and Yukon brands. Third-party devices are not supported.
Quick answer Visit the Firmware update page or go to “Settings” > “Device” in Stream Vision to check for updates. To check for firmware updates, follow these steps: Use the Firmware update link: Visit the Firmware update page to see the latest updates for your device. Check through Stream Vision: Open the app and go to “Settings” > “Device.” Select your product and click on “Check for Updates.” If an update is available, you will receive a notification and can proceed with the download. Enable Automatic Download (Optional): If “Automatic update download” is enabled, updates will be downloaded automatically without requiring user interaction. Note: Update installation must be performed manually, even if the update is downloaded automatically.
Quick answer Activate WiFi on your Pulsar device and phone, connect to the network with the device name, and ensure the passwords match. Launch Stream Vision to complete the connection. Follow these steps to connect your Pulsar device to your smartphone: Activate WiFi on your Pulsar device: Turn on WiFi on the device. The WiFi icon in the status bar will blink, and a question mark will appear next to it. Enable WiFi on your smartphone: Go to your phone’s WiFi settings and activate WiFi. Ignore any messages such as “weak signal” or “no internet connection.” Connect to the Pulsar device’s network: Find the network with your Pulsar device’s name (includes the device name and the last 4 digits of its serial number). Enter the WiFi password you have set on the Pulsar device. Ensure the passwords match to establish the connection. Tap “Connect.” Verify the connection: Once connected, the WiFi icon on your Pulsar device’s status bar will display a phone symbol, indicating a successful connection. Launch Stream Vision: Open the Stream Vision app on your phone. All main menu icons, including the viewfinder, should now be active.
Stream Vision only works in the horizontal (landscape) format.
Quick answer Stream Vision works with most Android phones, but stability is not guaranteed on devices without Google Play or Google services. Stream Vision is compatible with most Android smartphones. However, if your phone does not support Google Play or Google services , stable operation of the app cannot be guaranteed. Non-compatible models include: Huawei P40 / P40 Pro Huawei Mate 40 / Mate 30 /
Unfortunately, Pulsar devices do not have a GPS module or an IP tracking system for locating lost or stolen devices. What you can do: Send the serial number of your stolen device to support@pulsar-vision.com . Our service center will notify you if the device is ever returned for repair.
If you experience an error during a firmware update, ensure the following: Update Stream Vision: Verify you have the latest version of the Stream Vision app from Google Play or the App Store . Ensure sable connection: Ensure your mobile connection is stable throughout the download process. Disconnect from device: Make sure your phone is disconnected from the Pulsar device while downloading the firmware.
To ensure your device is compatible with Stream Vision 2, refer to the compatibility table available here .
Quick answer Download Stream Vision 2, connect your Pulsar device, download the firmware, and update the device. Use mobile data if the device is connected or WiFi if it isn’t. Follow these steps to update your Pulsar device’s firmware: Step-by-step instructions: Download the Stream Vision 2 App: Install the app from Google Play or the App Store free of charge. Connect your Pulsar device to your phone: Refer to the connection guide for detailed instructions. Launch the app: Open Stream Vision 2 and go to the “Settings” menu. Check for updates: Select your connected Pulsar device and press “Check for updates.” Download the update: If your Pulsar device is connected to your phone, use Mobile Data (GPRS/3G/4G/5G) to download the update. If the device is not connected but listed in the “Device” menu , you can use WiFi to download the update. Update your device: Once the update is downloaded, press “Update Device” and wait for the process to complete. The Pulsar device will restart automatically once the installation is finished.
Go to WiFi Settings > Access level setup menu item of your device to switch from Guest to Owner mode.
To determine if your device is compatible with Stream Vision 2 , please refer to the Stream Vision Compatibility Table . This table provides a complete list of devices supported by Stream Vision 2.
Quick answer Stream Vision 2 includes real-time video viewing, remote device control, a media gallery, firmware updates, free cloud storage, and a news feed. The Stream Vision 2 app offers the following key features: Video and photo gallery: Access and manage your media files directly from the app. Real-time remote viewing: Stream live video from your Pulsar device to your smartphone. Remote device control: Adjust settings and control your Pulsar device remotely via the app. Firmware updates: Easily update your Pulsar device’s firmware through the app. Free Cloud storage: Enjoy free space in the Stream Vision 2 cloud for storing media files. News feed: Stay updated with the latest news, updates, and information about Pulsar devices and features.
The Stream Vision 2 app may not be available for installation on some phones due to noncompliant technical characteristics of the device. Solution: Try installing the app on an alternative phone that meets the app’s technical requirements.
Quick answer Update the Stream Vision 2 app to the latest version via the Google Play Store to resolve the issue. If the Stream Vision 2 app closes unexpectedly on your Android device, the issue can likely be resolved by updating the app to the latest version. Solution: Open the Google Play Store on your Android device. Search for Stream Vision 2 and check for updates. Download and install the latest version of the app.
Yes, the scope is equipped with a built-in ballistic calculator. Please use the mobile application SV Ballistics to configure and adjust the ballistic calculator settings.
Quick answer Turn on Bluetooth on your riflescope and smartphone, use the Stream Vision Ballistics App to connect, and enter the pairing code shown on the riflescope screen. To pair your riflescope with the app, follow these steps: Activate Bluetooth on the riflescope: Turn on the Bluetooth module and select Bluetooth Pairing in the menu. Enable Bluetooth on your smartphone: Go to your phone’s Bluetooth settings and turn it on. Connect using the Stream Vision Ballistics App: Open the app and navigate to the Devices tab. Tap “Connect Device” and select your riflescope from the list of available devices. Click “Connect.” Enter the pairing code: A password will appear on the riflescope screen. Enter this code in the app within 15 seconds to complete pairing. Verify connection: A blue Bluetooth icon next to the riflescope name in the app confirms a successful connection. For a detailed procedure, refer to the Thermion 2 LRF XP50 Pro Manual .
Yes, the ballistic calculator is available, but it is offered as a separate app . For more details and to download the app, visit the Stream Vision Ballistics App Page .
Please input data manually.
You can download the newest version of the Stream Vision Ballistics app here: For iOS devices : Download on the App Store For Android devices :
You can access detailed instructions for the Stream Vision Ballistics app here: For iOS devices: iOS Instructions For Android devices: Android Instructions Video Guide: Watch this step-by-step video guide for the Stream Vision Ballistics app: Stream Vision Ballistics Video Tutorial .
We’re here to help! If you have additional questions, please reach out to your dealer or distributor for assistance. Alternatively, you can send us an email to support@pulsar-vision.com . We’re happy to assist you with anything else you need!
Yes, all personal information will be removed from your device during the upgrade process. Make sure to back up any important footage to a safe location before sending in your device.
Related resources
Manuals
Find and download user manuals for your Pulsar device, with instructions for setup, operation, and features.
Check your firmware
Check the latest firmware version for your Pulsar device and find everything you need to keep it up to date.
Customer support
Get help with your Pulsar device, product questions, troubleshooting, and other support needs.